Table of Contents
Banana pudding is a dessert that brings comfort and joy to many. It combines creamy pudding, sweet bananas, and crunchy wafers to create a delightful treat. Whether it’s served at family gatherings, picnics, or Sunday dinners, banana pudding holds a special place in American culture, particularly in the South.
History and Origins
The history of Best banana pudding began in the late 19th century when bananas became more available in the United States. Thanks to advancements in transportation, this tropical fruit became easier to find. At that time, bananas were seen as both unique and luxurious, which made desserts featuring them very popular. Early banana pudding recipes first appeared in cookbooks during the 1880s. These recipes were similar to English trifles, which are made by layering custard, sponge cake, and fruit.
Over time, as bananas became cheaper, banana pudding evolved into a dessert that anyone could make. In the mid-20th century, vanilla wafers were added to recipes, giving the dish a crunchy texture. This simple addition helped banana pudding become the classic dessert that people love today.
Popularity in Southern Cuisine
Although banana pudding is enjoyed across the United States, it is especially cherished in the South. It is a common sight at potlucks, barbecues, and family celebrations. One reason for its popularity is its versatility. Southern cooks often put their own spin on the recipe by adding meringue, whipped cream, or extra layers of pudding. These variations make the dessert even more appealing.
Another reason for its enduring popularity is its affordability. The main ingredients—bananas, pudding, milk, and vanilla wafers—are easy to find and inexpensive. This makes banana pudding a dessert that anyone can prepare and enjoy. Moreover, the tradition of making and sharing banana pudding has helped bring families together for generations.
With this rich history and cultural significance in mind, let’s explore how you can make the best banana pudding, along with tips and variations to suit everyone’s taste.
Essential Ingredients for Banana Pudding
The secret to making the best banana pudding lies in using the right ingredients. Each component contributes to the dessert’s unique flavor and texture, so choosing wisely can make all the difference. Let’s break down the essential ingredients and explore their best options.
Bananas: Choosing the Right Ripeness
Bananas are the star of this dessert, so their ripeness is key to achieving the perfect balance of sweetness and texture. For banana pudding, choose bananas that are ripe but not overly soft. Look for fruit with a bright yellow peel and a few brown specks. These bananas are sweet and flavorful while still firm enough to hold their shape when layered. Avoid green bananas, as they can taste bland, and overly ripe bananas, which may become mushy.
Pro tip: Slice the bananas just before assembling the dessert to prevent them from browning. If you need to prep in advance, coat the slices lightly with lemon juice to preserve their color.
Vanilla Wafers vs. Other Cookies
Vanilla wafers are the classic choice for banana pudding. They provide a delicate crunch that softens as they absorb the pudding, creating a perfect balance of textures. Their subtle vanilla flavor complements the bananas and custard without overpowering the dessert.
If you’re looking to experiment, other cookies can work well too. Shortbread cookies add a buttery richness, while graham crackers provide a slightly nutty flavor. For a unique twist, try using gingersnaps or chocolate wafer cookies to bring a different dimension to your pudding.
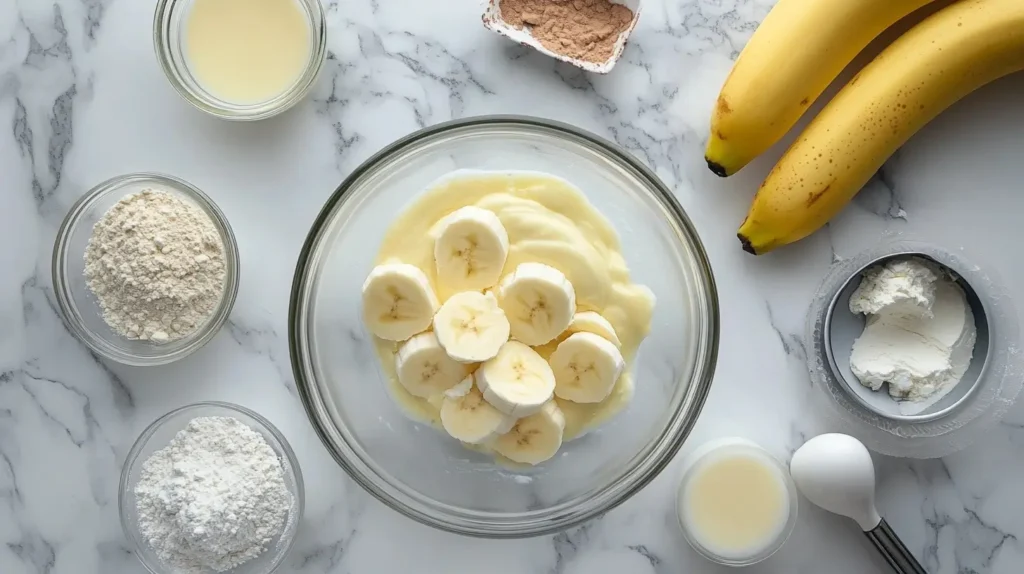
Pudding Base: Homemade Custard vs. Instant Mix
The pudding base is the heart of banana pudding. You can opt for a homemade custard or use an instant pudding mix, depending on your preference and time constraints.
- Homemade Custard: For a rich and creamy texture, homemade custard is unbeatable. Made with eggs, sugar, milk, and vanilla, it offers a depth of flavor that elevates the dessert. While it requires more time and effort, the results are worth it for those who enjoy cooking from scratch.
- Instant Mix: If convenience is your priority, instant pudding mix is a reliable option. It’s quick, easy, and still delivers a smooth, flavorful base. To enhance the taste, consider adding a splash of real vanilla extract or using whole milk instead of lower-fat options.
Dairy Options: Whole Milk, Cream, and Alternatives
The type of dairy you use affects the richness and texture of the pudding. Traditional recipes often call for whole milk or a combination of milk and heavy cream for a luscious, velvety texture. If you prefer a lighter option, you can use reduced-fat milk, but keep in mind that it may result in a thinner consistency.
For those with dietary restrictions, plant-based milk alternatives like almond milk, coconut milk, or oat milk work well. Be sure to choose unsweetened varieties to control the dessert’s sweetness. Adding a teaspoon of cornstarch can help thicken the pudding if needed.
By carefully selecting the ripeness of your bananas, experimenting with cookie options, and choosing the perfect pudding base and dairy, you can craft a banana pudding that suits your taste and impresses your guests. Each ingredient plays a vital role, so take the time to pick the best!
Step-by-Step Preparation Techniques
Creating the perfect banana pudding requires attention to detail and careful layering to achieve the ideal balance of flavors and textures. Follow these step-by-step techniques to ensure your banana pudding is as delicious as possible.
Preparing the Pudding Base
The pudding base is the heart of the dessert, so preparing it correctly is crucial. Whether you choose a homemade custard or an instant mix, the following tips will help you get it right:
- For Homemade Custard:
- In a medium saucepan, whisk together sugar, cornstarch, and a pinch of salt.
- Gradually stir in whole milk and bring the mixture to a simmer over medium heat, stirring constantly to avoid lumps.
- In a separate bowl, lightly beat egg yolks. Slowly add a small amount of the hot milk mixture to the yolks to temper them. Then, pour the tempered yolks back into the saucepan.
- Cook until the custard thickens enough to coat the back of a spoon. Remove from heat and stir in vanilla extract. Allow it to cool slightly before using.
- For Instant Pudding Mix:
- Combine the pudding mix with cold milk according to package instructions. Use whole milk for a creamier texture.
- Whisk the mixture until smooth and thickened, which usually takes about 2–3 minutes. Let it sit for a few minutes to fully set.
Pro Tip: For an extra indulgent pudding base, fold in a bit of whipped cream to lighten the texture and add richness.
Layering: Achieving the Perfect Balance
Layering is where banana pudding comes to life. To get the perfect balance of flavors and textures, follow these steps:
- Start with Vanilla Wafers:
- Arrange a single layer of vanilla wafers at the bottom of your serving dish or individual cups. The wafers will soften over time, absorbing the flavors of the pudding.
- Add Bananas:
- Slice the bananas into even rounds, about ¼ inch thick. Layer them on top of the wafers to ensure every bite has a piece of banana.
- Spread the Pudding:
- Pour or spoon a layer of pudding over the bananas, spreading it evenly to cover them completely. This seals the bananas and prevents browning.
- Repeat the Layers:
- Continue layering wafers, bananas, and pudding until the dish is filled. End with a final layer of pudding to give the dessert a smooth, polished appearance.
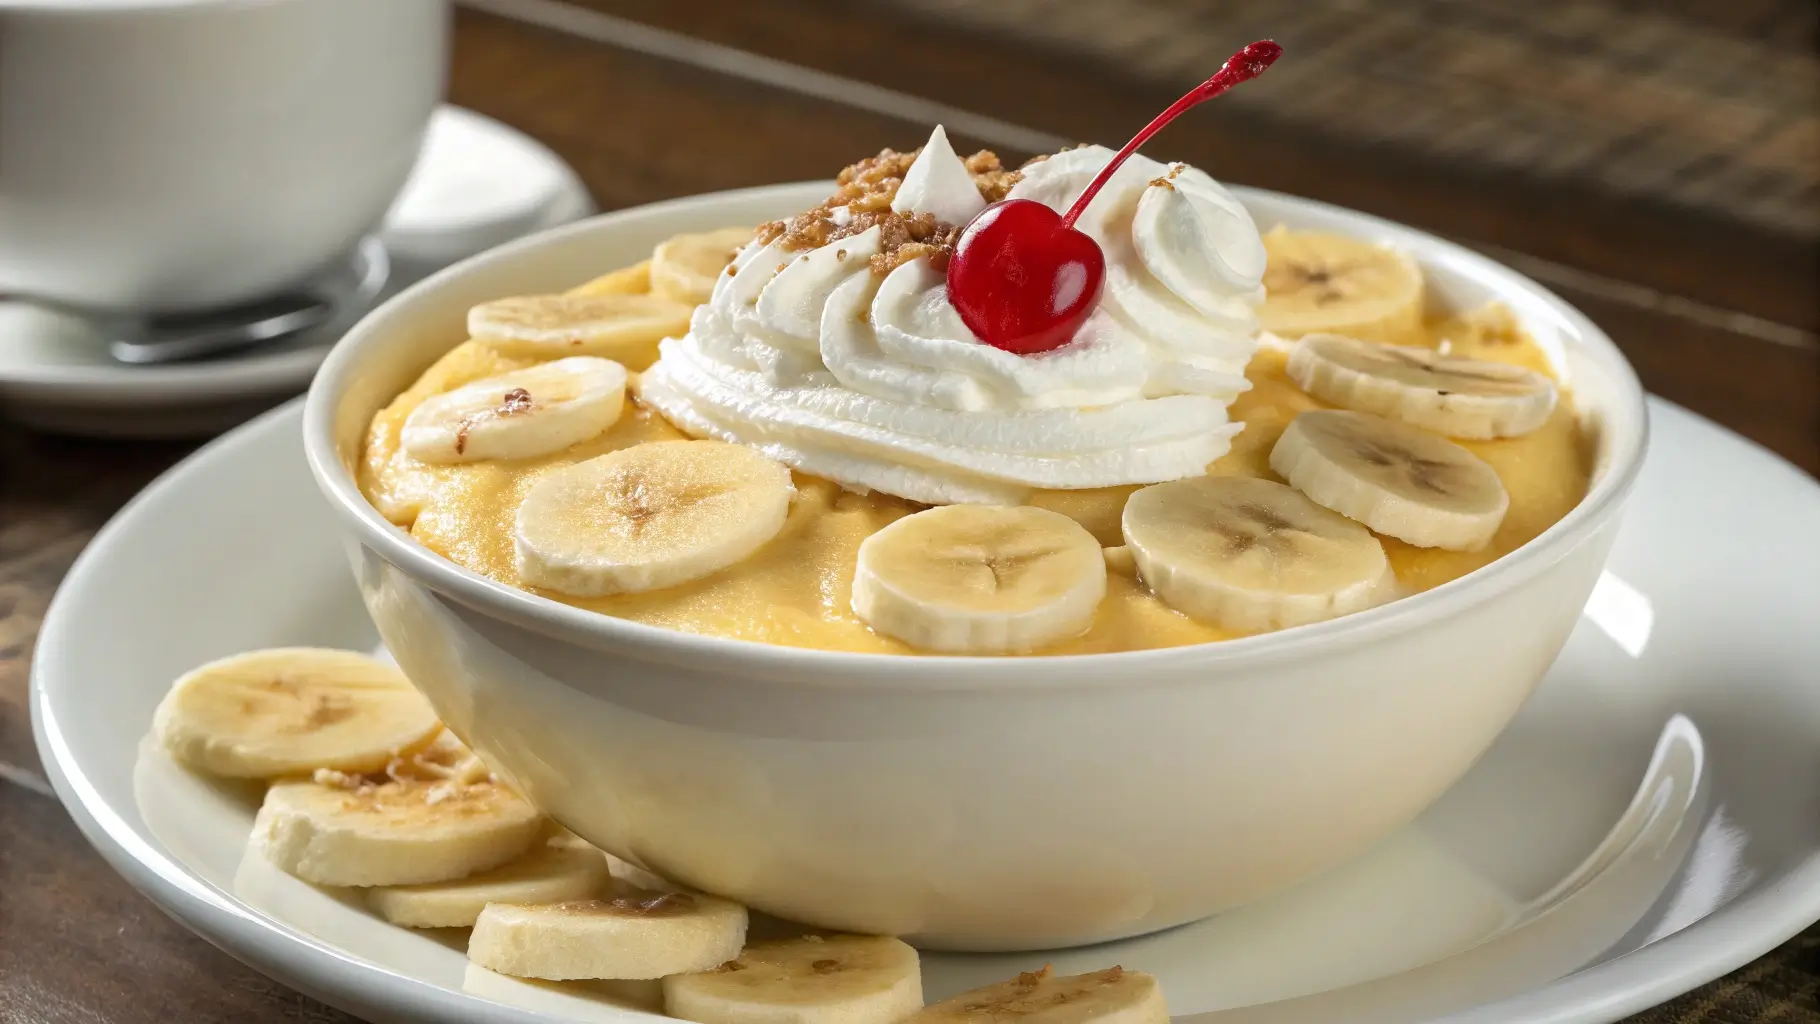
- Optional Toppings:
- Add whipped cream, crushed wafers, or meringue as the top layer for added texture and visual appeal.
Chilling Time: Importance of Resting Period
Once assembled, banana pudding needs time to rest and chill. This step allows the flavors to meld and the wafers to soften to a cake-like consistency. Follow these guidelines:
- Chill for at Least 4 Hours:
- Cover the dish with plastic wrap or a lid and refrigerate for a minimum of 4 hours. For best results, let it rest overnight.
- Check the Texture:
- Before serving, ensure the pudding has set properly, and the layers have melded. The wafers should be soft but not soggy.
- Serve Cold:
- Banana pudding is best served chilled. Garnish with extra banana slices or a sprinkle of wafer crumbs right before serving for a fresh touch.
By preparing a smooth pudding base, carefully layering the ingredients, and allowing ample chilling time, you’ll create a banana pudding that is perfectly balanced, flavorful, and irresistible.
Equipment Needed for the Perfect Banana Pudding
Having the right equipment on hand can make preparing banana pudding easier and more enjoyable. Here’s a breakdown of the essential tools you’ll need to create a flawless dessert, from mixing to serving.
Mixing Tools: Whisks, Bowls, and More
The mixing process is the foundation of your banana pudding, so the tools you use are critical. Here are the key items you’ll need:
- Whisks:
- A sturdy whisk is essential for preparing the pudding base, especially if you’re making a homemade custard. It ensures a smooth texture and prevents lumps from forming.
- Mixing Bowls:
- Use a set of mixing bowls in various sizes to prepare and hold ingredients. Stainless steel or glass bowls work best as they’re durable and easy to clean.
- Saucepan:
- If you’re making homemade custard, a medium-sized heavy-bottomed saucepan is ideal. It provides even heat distribution to prevent scorching.
- Spatula or Silicone Scraper:
- A flexible spatula is great for scraping down the sides of the bowl or saucepan to ensure you don’t leave any pudding behind.
- Measuring Cups and Spoons:
- Precise measurements are key to achieving the right consistency and flavor. Use measuring tools for both dry and liquid ingredients.
- Electric Mixer (Optional):
- If you’re folding whipped cream into the pudding base or preparing a meringue topping, an electric mixer can save time and effort.
Serving Dishes: Trifles, Individual Cups, or Traditional Pans
The way you serve banana pudding can elevate its presentation. Here are some popular options to consider:
- Trifle Bowl:
- A glass trifle bowl is a classic choice for banana pudding. Its clear sides showcase the beautiful layers of wafers, bananas, and pudding, making it a centerpiece-worthy dessert.
- Individual Cups or Jars:
- For a modern twist, serve banana pudding in individual cups, mason jars, or ramekins. These single servings are not only convenient but also add a touch of elegance.
- Traditional Baking Dish or Pan:
- A standard 9×13-inch baking dish is a practical and traditional choice. It’s perfect for large gatherings and allows for easy slicing and serving.
- Disposable Containers (for On-the-Go):
- If you’re bringing banana pudding to a potluck or picnic, disposable aluminum pans or plastic containers are convenient and mess-free.
- Toppings Accessories:
- Have a small spoon, piping bag, or offset spatula handy for adding whipped cream or meringue. Crushed wafers or banana slices can be sprinkled on top just before serving.
With the right tools and serving dishes, you’ll not only streamline the preparation process but also elevate the presentation of your banana pudding. Choose equipment that suits your style and needs to make this beloved dessert even more special.
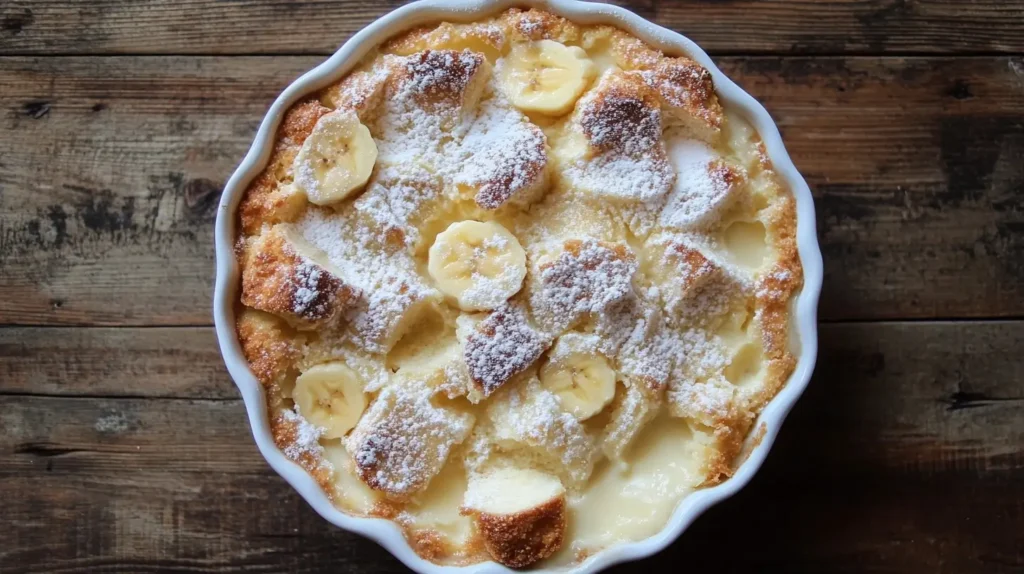
Delicious Variations to Try
While traditional banana pudding is a classic dessert, adding unique flavors can elevate it to new heights. Here are two exciting variations that put a delicious twist on this timeless treat.
Chocolate Banana Pudding
For chocolate lovers, this variation adds a rich, indulgent touch to the classic recipe. The combination of chocolate and bananas creates a decadent dessert that’s sure to impress.
Ingredients:
- Cocoa powder or melted chocolate (for the pudding base)
- Chocolate wafer cookies or crushed chocolate sandwich cookies
- Optional: chocolate shavings or chips for garnish
How to Make It:
- Prepare the Pudding Base:
- If making homemade custard, whisk in cocoa powder or melted chocolate while cooking. For an instant mix, use chocolate-flavored pudding instead of vanilla.
- Layer the Ingredients:
- Start with a layer of chocolate cookies instead of vanilla wafers. Add banana slices and chocolate pudding, then repeat the layers.
- Add Toppings:
- Finish with whipped cream and garnish with chocolate shavings, chips, or a drizzle of chocolate syrup for extra flair.
- Chill and Serve:
- Allow the pudding to rest in the fridge for at least 4 hours to meld the flavors. Serve cold.
Why It Works:
The richness of chocolate balances the natural sweetness of bananas, creating a bold and irresistible flavor combination.
Peanut Butter Infusion
Peanut butter and bananas are a match made in heaven, and this variation proves it. The nutty flavor of peanut butter adds depth and creaminess to the pudding, making it a crowd-pleaser.
Ingredients:
- Peanut butter (creamy or natural)
- Vanilla wafers or peanut butter cookies
- Optional: crushed peanuts or a drizzle of peanut butter for garnish
How to Make It:
- Prepare the Pudding Base:
- Mix a few tablespoons of creamy peanut butter into the custard or pudding base while it’s still warm. Stir until smooth and well combined.
- Layer the Ingredients:
- Use vanilla wafers or peanut butter cookies as the base layer. Add banana slices and the peanut butter-infused pudding. Repeat the layers until the dish is full.
- Add Toppings:
- Top with whipped cream, a drizzle of melted peanut butter, or a sprinkle of crushed peanuts for texture.
- Chill and Serve:
- Refrigerate the dessert for several hours before serving to let the flavors meld together.
Why It Works:
The creamy, salty-sweet flavor of peanut butter complements the bananas and adds a delightful richness to the pudding.
By trying these delicious variations, you can bring a creative twist to your banana pudding while still honoring its classic charm. Whether you choose the indulgence of chocolate or the nutty flavor of peanut butter, these recipes are sure to delight your family and friends.
Common Mistakes to Avoid
Banana pudding is a simple yet delicate dessert that can go wrong if not prepared properly. Here are some common mistakes and how to avoid them for the best results.
Preventing Banana Browning
One of the most common issues with banana pudding is the browning of banana slices, which can affect the appearance and taste of the dessert.
Mistake:
Slicing bananas too early or not protecting them from exposure to air.
Solution:
- Slice bananas just before assembling the pudding to minimize their exposure to oxygen.
- Lightly coat the slices with lemon juice or pineapple juice to slow oxidation. Be sure to use a light hand to avoid altering the flavor of the dessert.
- Fully cover the bananas with pudding in each layer. This seals them from air and keeps them fresh longer.
Avoiding Soggy Wafers
While softened wafers add a delightful texture to banana pudding, they can become too soggy if not handled properly.
Mistake:
Adding the wafers too early or using excessive liquid in the pudding.
Solution:
- Assemble the pudding just a few hours before serving. This gives the wafers enough time to soften slightly without becoming mushy.
- Avoid overly watery pudding. If your pudding is too thin, refrigerate it until it thickens before layering.
- Use high-quality vanilla wafers, as they hold their texture better when layered with pudding and bananas.
Ensuring Smooth Pudding Texture
A lumpy pudding base can ruin the creamy consistency that makes banana pudding so enjoyable.
Mistake:
Improper mixing or cooking techniques, especially for homemade custard.
Solution:
- For Homemade Custard: Whisk constantly while cooking and temper the egg yolks properly to prevent them from curdling. Use a fine-mesh strainer to remove any lumps before cooling the custard.
- For Instant Pudding Mix: Measure the liquid accurately and whisk thoroughly to dissolve the mix completely. Let it sit for a few minutes to thicken before layering.
- If you’re aiming for an extra smooth texture, use an immersion blender to remove any lumps before layering.
By avoiding these common mistakes, you can ensure your banana pudding turns out perfectly every time. Following these tips will help you create a dessert that looks as good as it tastes, with fresh bananas, perfectly soft wafers, and a creamy, smooth pudding base.
Conclusion
Banana pudding is more than just a dessert—it’s a comforting, nostalgic treat that brings people together. Whether you stick to the traditional recipe or experiment with variations like chocolate or peanut butter, the possibilities are endless. By using high-quality ingredients, mastering the layering technique, and avoiding common mistakes, you can create a pudding that’s as beautiful as it is delicious.
For those who love exploring new flavors, why not pair your banana pudding with other delightful desserts, like this Decadent Chocolate Cobbler Recipe? It’s a perfect combination to elevate any gathering or celebration.
No matter how you serve it, banana pudding is sure to delight your family and friends. Enjoy every creamy, sweet, and satisfying bite!